
Part One – Configuring Shopify
HOW TO SETUP SHOPIFY IN KYOZOU
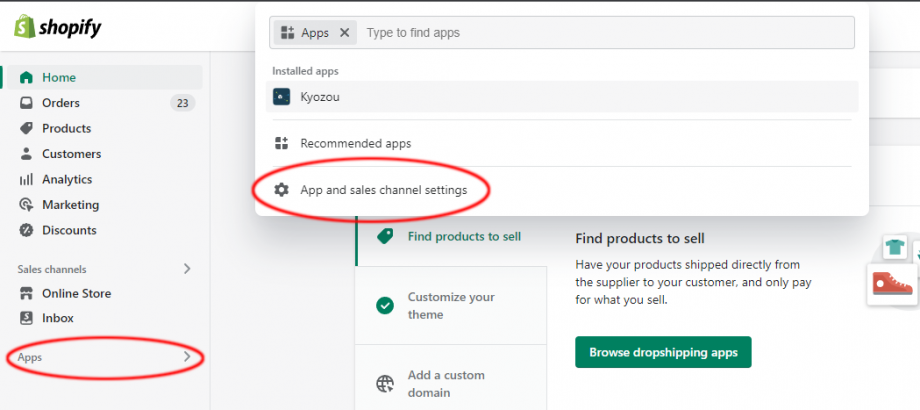
Log into your Shopify account to add Kyozou as a new custom app. Click on Apps in the Panel on the left and click on “App and sales channel settings” in the search menu.
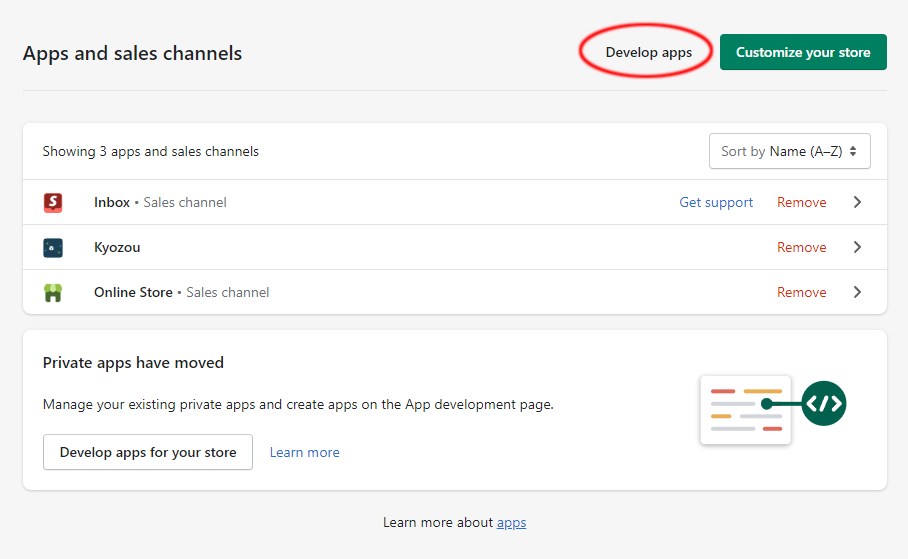
- Click on “Develop apps”
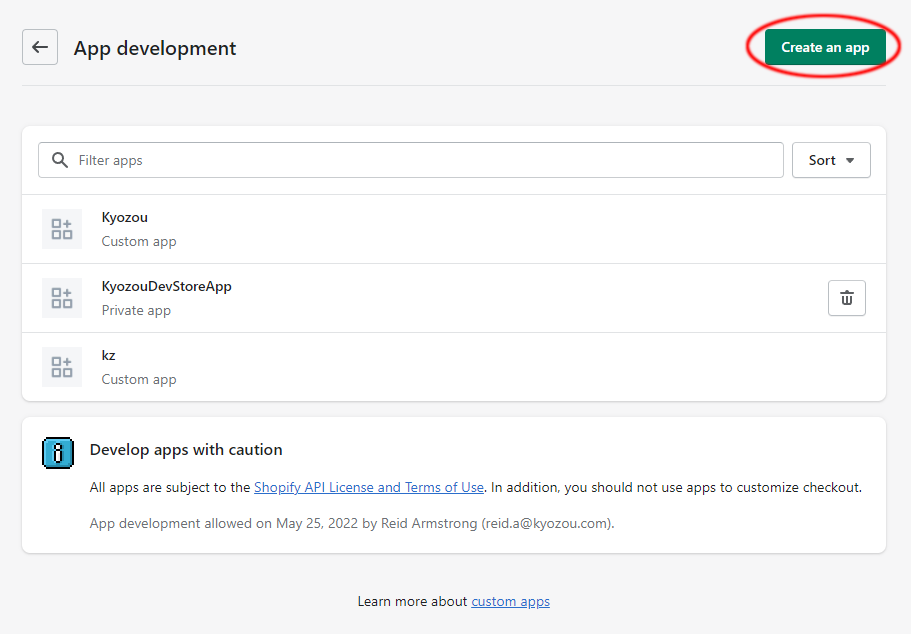
- Now click on the “Create an app” button
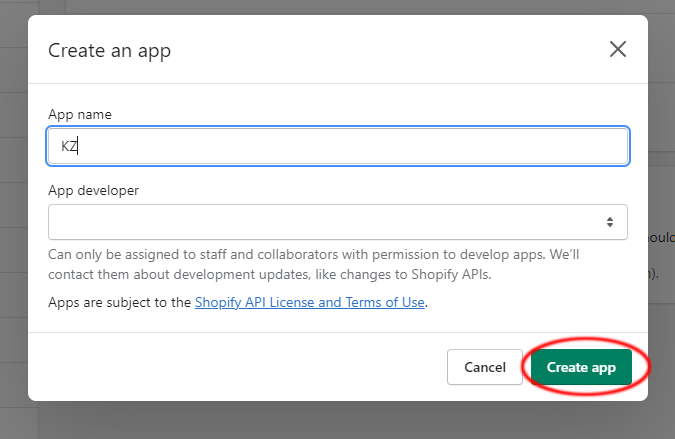
- In the pop-up, give your app a name. You can use “KZ” or “Kyozou” as an example.
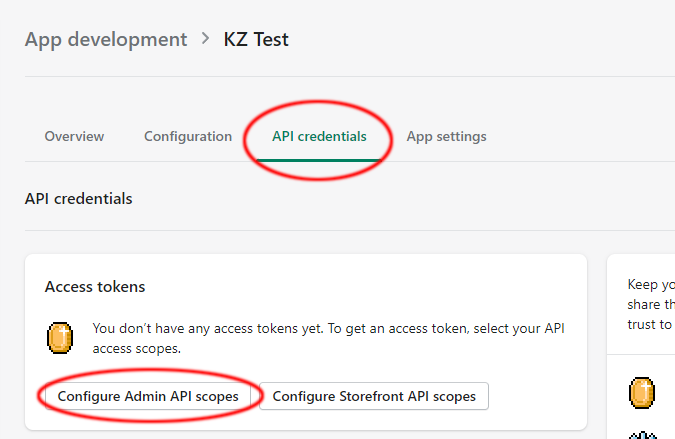
- Once the app is created, click on the API credentials tab and click on the “Configure Admin API scopes” button
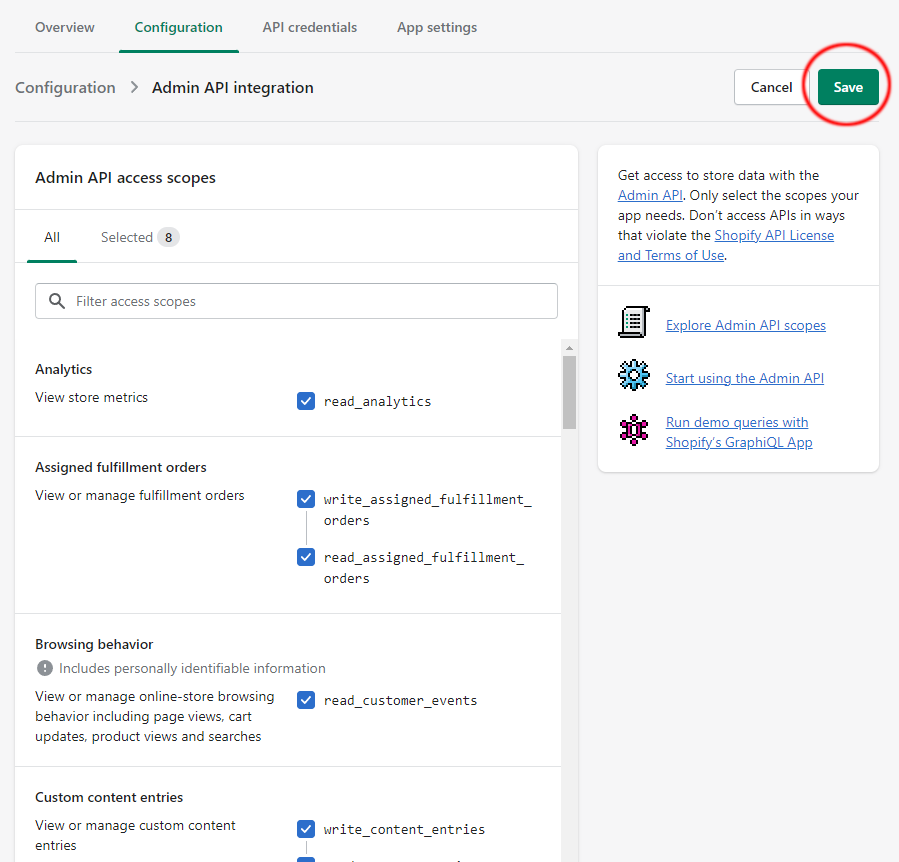
- Select all the checkboxes in the next page and click “Save”
- After clicking save, you will see a “Install app” button. Click on it. Then click “Install” again in the popup that appears.

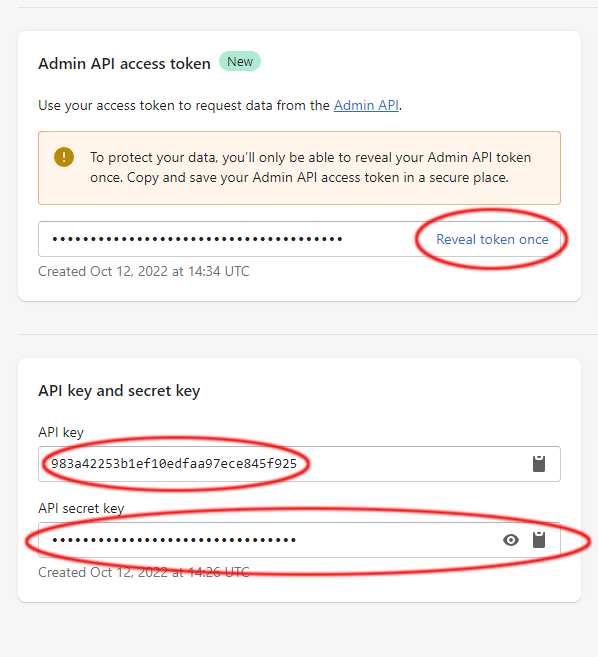
- After installing the App you will see all your API Tokens. Click on “Reveal token once” Make sure to copy this and save it somewhere safe, Shopify will only show you this code once. Copy the API key and API secret key as well.
Part Two– Configuring Shopify in Kyozou
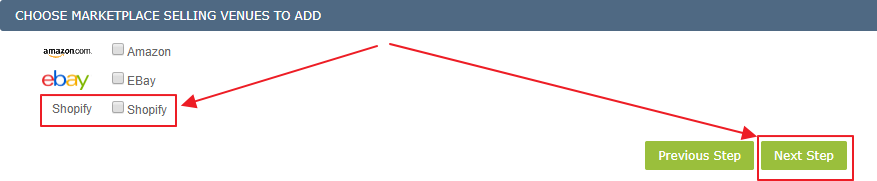
- Log into your Kyozou account and go to Administration>>Control Panel>>Step 11, where you will choose Shopify as a new Marketplace Selling Venue to Add. Then click Next Step.
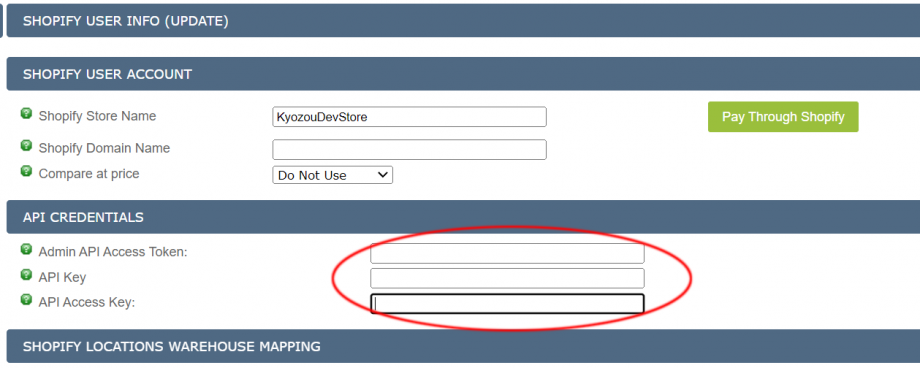
- Upon clicking Next Step, you will be taken to the Shopify User Info page, where you will fill in the Shopify Store Name and all your Tokens that you set up above.
- Shopify Stone Name: you can find the name of your Shopify store by looking at the URL address bar.
- In the screenshot below you can see that the name of the Shopify store is “kyozou-shop”.

- Now add the Admin API Access Token, API Key and API Access Key(Secret Key) into the fields below
- Now click on the “Next Step” button.
- The store is now saved in Kyozou. Click on Step 10 one more time and select your Shopify store.
- At this stage, you’ll need to map your Shopify Location to Kyozou warehouse.
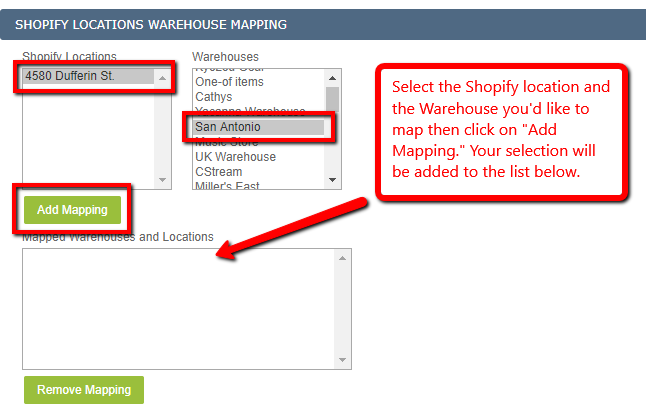
Once you mapped your Shopify location to Kyozou warehouse, click on the “Update” button.
Part Two – How to Create & List Products to Shopify
HOW TO CREATE A PRODUCT WITH SHOPIFY SETTINGS
-
- After adding your Shopify account into Kyozou, you will see a new section at the very bottom in the Product Details page.

-
- Unselect the “Do not list to Shopify” checkbox to reveal the Shopify listing options.

Override Title: Select this checkbox if you’d like to specify a different title for your Shopify Listings. Leaving this unchecked will use the default Title for the product.
Price: Input the price you’d like to set for this product on Shopify.
Tags: Tags control your website categories. Each tag needs to be separated with a comma. (Your website categories should already be present on Shopify to utilize this field.)
-
- Click “Save product(s)” to create or save your product.
HOW TO CREATE A PRODUCT WITH SHOPIFY SETTINGS VIA EXCEL
Here are the headers you will need to use to update the Shopify listings options for your products:
| ProductID | shopify_Title | shopify_Tags | shopify_SellerId | shopify_Price |
| 12345 | Shopify Test RC 6 | MJ23, Test1 | 1 | 10 |
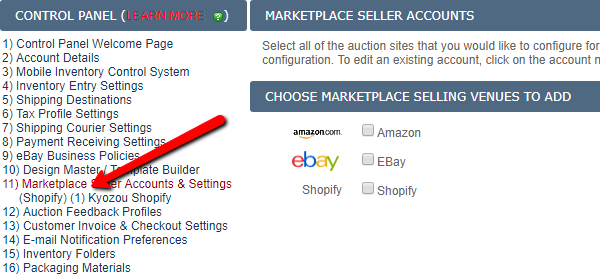 To find your Shopify SellerID head over to the Control Panel and click on “11) Marketplace Seller Accounts & Settings” and you’ll see a list of all your marketplaces appear below. The number you see in brackets next to your Shopify account is your SellerID.
HOW TO LIST A PRODUCT TO SHOPIFY
All products being listed to Shopify need to be done through the Multi-Lister.
- Navigate to Listings / Multi-lister / Launch New Listings
- Select the item you would like to list to Shopify/Multi-Lister and in the “For selected item(s)” dropdown menu, select “List to Multi-lister”

- You will be taken to a confirmation page where you can modify the quantity that you want to list to Shopify/Multi-lister. Once you set your quantity click “List To Multilister”
- Your item will launch to Shopify within 30 minutes.
HOW TO EDIT A SHOPIFY LISTING
- Navigate to Listings / Multi-Lister / Current Listings
- Set the “Selling Venues” Dropdown menu to “Shopify” and the “Listing Status” Dropdown menu to “Active” and click the “Search” button.
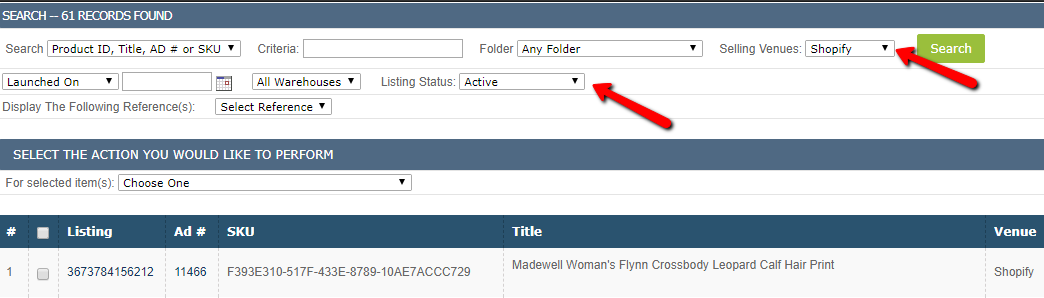
- Search for the item you would like to revise.
- Click on the checkbox and in the “For selected item(s)” Dropdown select the settings you’d like
to revise.

End Listing: This will end the listing on Shopify.
End Listing(s) & Remove Venue from Multi-Lister: This will remove the Shopify Venue from the Multi- Lister active listings page.
Revise Title, Description and Tags: This will revise the Shopify Title, Description and the Tags.
Revise Prices: This will revise the Shopify Price.
Leave A Comment?
You must be logged in to post a comment.