Summary
In this article, you will learn how to upload Videos from your Computer and add them to your Listings.
Upload a video to your Product
- In the Product Details page you will see a new section called “PRODUCT VIDEO(S) (EBAY ONLY)”
- You will see two buttons: Upload New Video and Attach Existing Video
- Click on “Upload New Video” a popup will appear.

- In this popup you can assign a title and description to the video. Once that’s done click “Choose File” and find the video file on your computer.
- Click “Upload File”
- You will now see that your video will be in “Processing” status

- Save the Product.
- You can list the item to and eBay will take time to process the video(They check to make sure there is no inappropriate content) Once eBay has processed the video, it will appear on your listing.
Adding Existing Videos to other Products
If you are attaching the same video to multiple products, you won’t need to upload the video multiple times. You can just assign the video to other products using the VideoID.

- Copy the text you see under the “VideoId” header.
- Go into another product and click “Attach Existing Video”

- In the popup window paste the VideoId you copied from the previous product and click “Attach Video”

- You will see the video appear just like in the previous product.

You can also attach the VideoId in bulk via Excel with the following headers:
| ProductID | ebay_VideoIds |
Revising Active Listings
If you would like to add videos to existing listings follow these steps:
- Follow Steps 1 to 7 at the top of this article.
- Navigate to Listings / eBay / Listings Overview / Active Listings
- Search for the product you want to revise and select the checkbox.
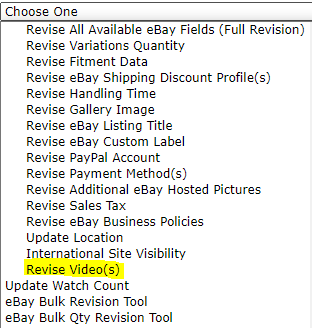
- In the “Choose One” drop down menu select “Revise Video(s)”


Leave A Comment?
You must be logged in to post a comment.