Summary
Installing a Thermal printer will allow you to print Kyozou inventory labels or shipping labels. This step-by-step guide will help you to set up the thermal printer on your Windows machine.
Task Requirements:
- Go to Administration> Control Panel> Step 3 and click on “Mobile Inventory Control System”. Scroll down to the section where it says “Click here to download Eltron/Zebra LP 2844 thermal printer drivers” (click the image below).
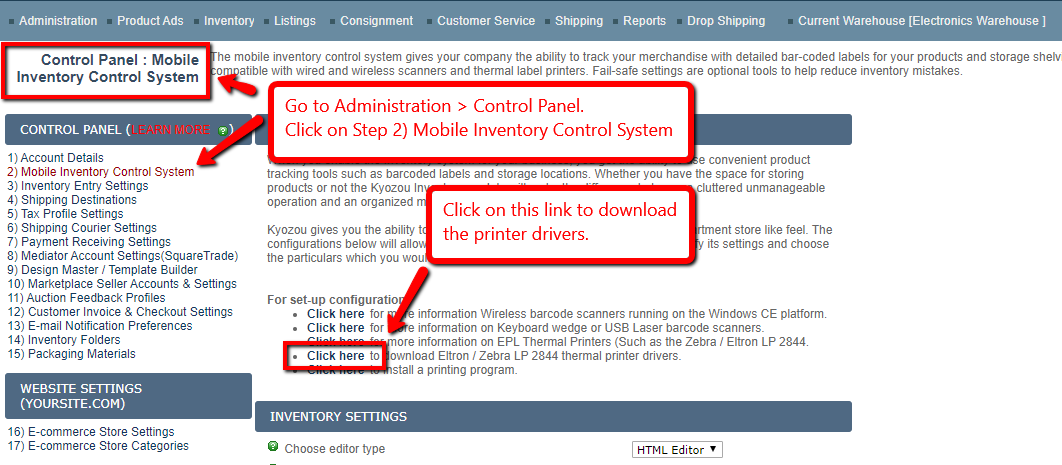
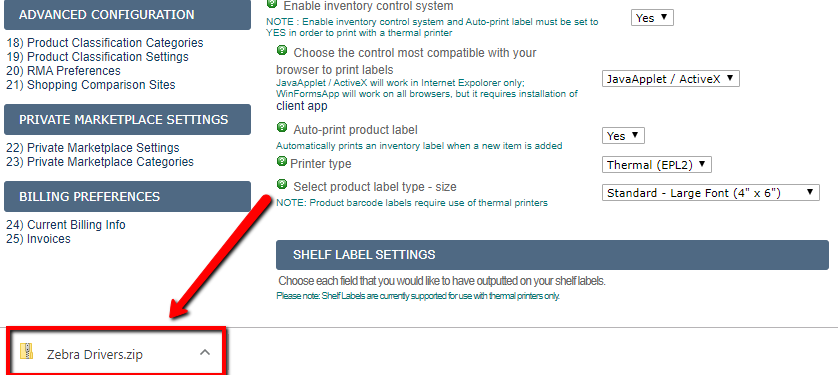
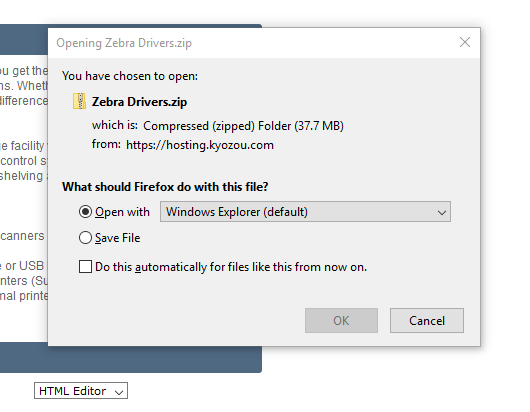
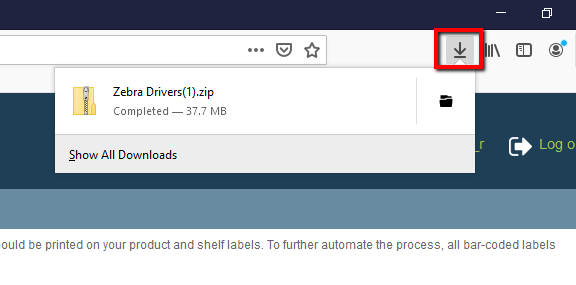
- Chrome will automatically download the file while Firefox may ask you to Open or Save it. Please save it in a folder you that you can easily locate. Both Chrome and Firefox will download the file to Downloads folder by default.
- Chrome Download:
- Firefox Download:
- Chrome Download:
- Once the file is saved, browse to the folder it is located in and extract the contents.
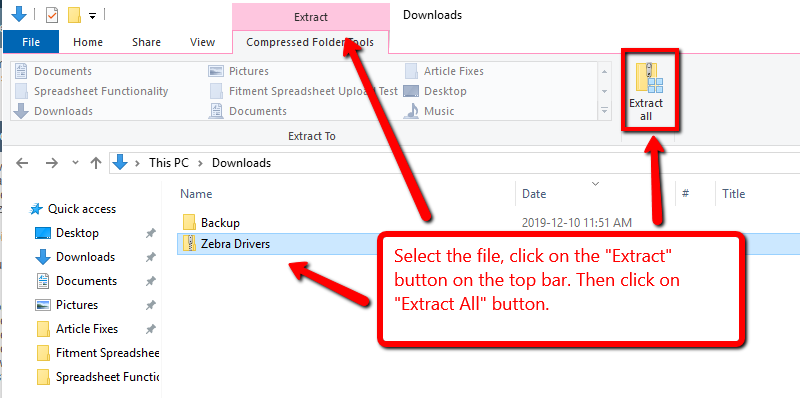
- You will see a new folder titled Zebra Drivers (it should open automatically after extraction is complete).
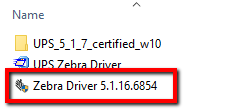
- There will be 2 files inside the folder:
- If you have a UPS branded Zebra printer you would need to use the UPS Zebra Driver file. You will need to extract the contents of this file.
- Double click on the file to begin.
- It will ask you to choose a folder to extract the contents to. Please choose the current folder for ease of use.
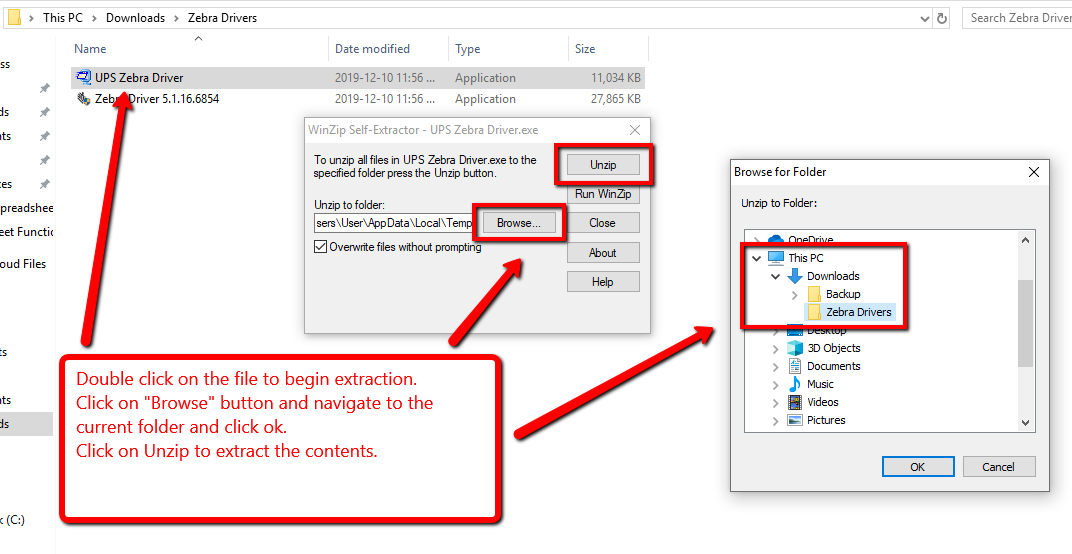
- You will see a new folder titled “UPS_5_1_7_certified_w10.”
- Otherwise, use Zebra Driver 5.1.16.6854 file. Double click on the file to begin.
- If you have a UPS branded Zebra printer you would need to use the UPS Zebra Driver file. You will need to extract the contents of this file.
We need to uninstall previous versions first (if it exists):
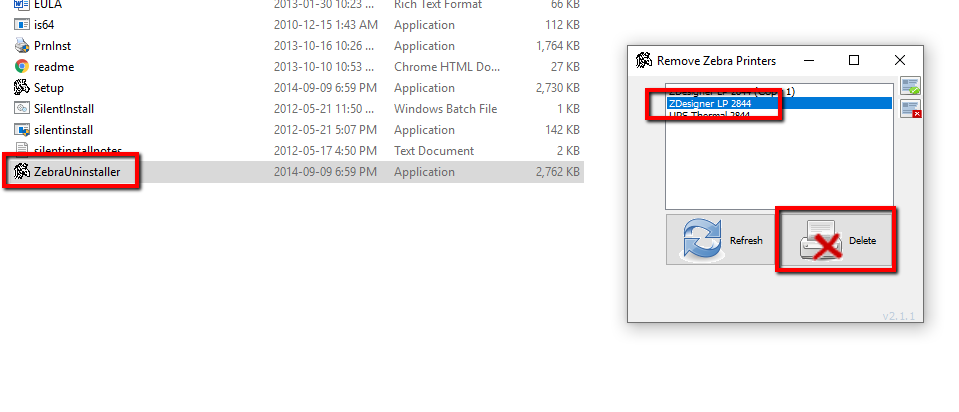
- If you are using the UPS Driver, locate the ZebraUninstaller file in the extracted folder and run it.
- In the new window, select the old driver and click on “Delete”
- If you are using Regular Zebra Driver, double click on the file Zebra Driver 5.1.16.6854 to begin.
- Follow the prompts until you see the following window:
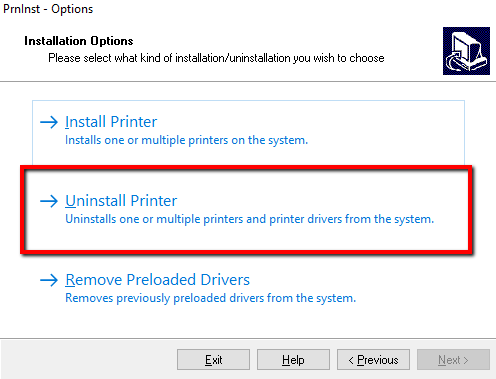
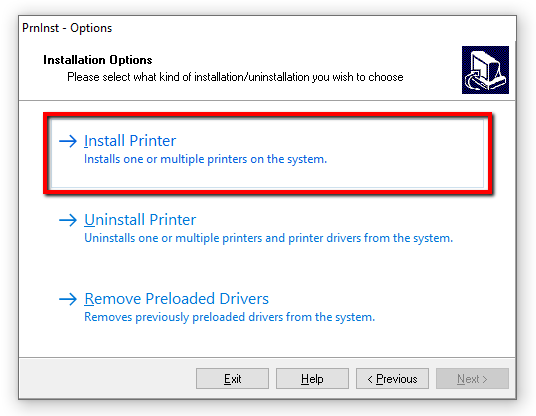
- Click on Uninstall Printer
- Select the old driver and click on next.
- Your old drivers should now be uninstalled.
How to find your printer type:
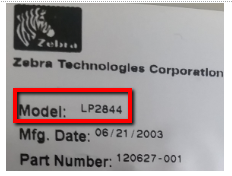
The make and model number should be located at the bottom of the printer. Please see the screenshot below for reference. You can verify your printer model via Zebra’s website. (https://www.zebra.com/us/en/products/printers/desktop.html)
Note: If you see a model number with the letters “UPS”. Then you have a UPS Zebra printer.
Continue with the guide below if you have a Zebra branded printer:
- Run the file titled Zebra Driver 5.1.16.6854
- Follow the prompts until you see the window below. Click on Install Printer.
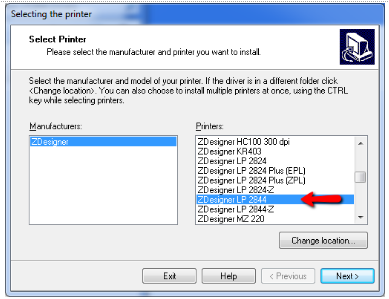
- Select your printer model in the list and click “Next” (click the image below).
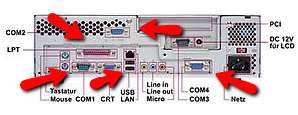
- Specify which port your printer is hooked up to (COM, LPT or USB001) and click Next.
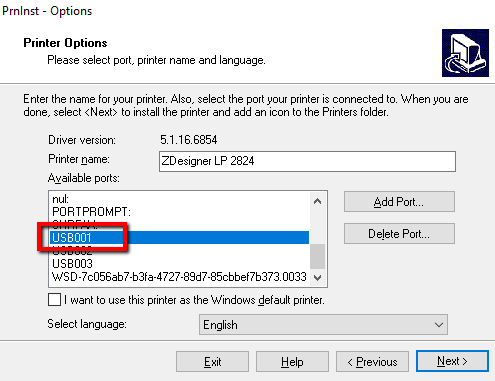
- If you are unsure about which port you are using, please see the image below.
- The installer will ask if you want to launch the installation of the “Zebra Font Downloader Setup Wizard”. Unselect that option as it is not needed for printing through Kyozou and click “Finish”.

You have now installed a Zebra Printer for use.
How to test the printer:
- Once the installation is completed, go to the “Printers & Scanners” menu within Windows.
Click Printers & Settings link for quick access.
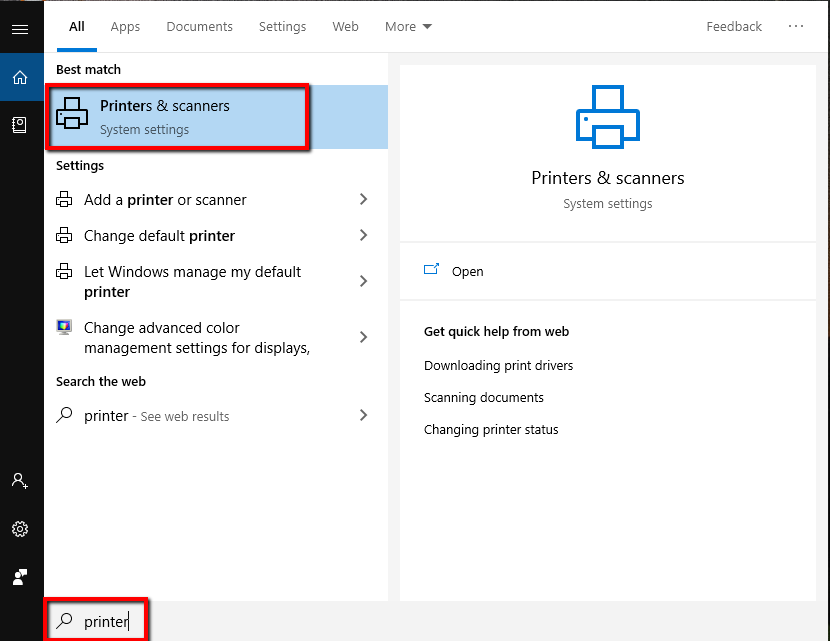
- Locate the newly installed thermal printer, select it and click on “Manage”

- Click on “Print a Test Page.”
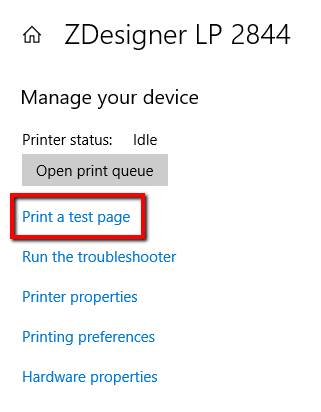
- If a test page gets printed, then you have successfully installed your printer.
How to install a UPS Printer:
- If you have a UPS Printer, the steps are very similar as per the guide above.
- Locate and go into the folder UPS_5_1_7_certified_w10
- Double click on the “Setup” file.
- Click on “Install Zebra Printer”
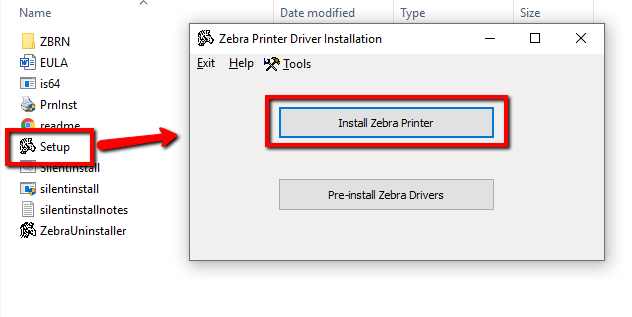
- Select the correct model number from the list and click Next. (At this point, you can refer to the guide above for a more detailed walkthrough.)
- Specify which port your printer is hooked up to (COM, LPT or USB001) and click Next.
- The installer will ask if you want to launch the installation of the “Zebra Font Downloader Setup Wizard”. Unselect that option as it is not needed for printing through Kyozou and click “Finish”.
You have now installed a UPS printer. Conduct a few test prints to confirm if the printer works as desired.

Leave A Comment?
You must be logged in to post a comment.