
Summary
Kyozou allows you to connect a number of preferred and popular shipping services with your Kyozou account. This step-by-step guide will teach you how to connect your UPS account in Kyozou.
Task Requirements:
How to setup UPS settings:
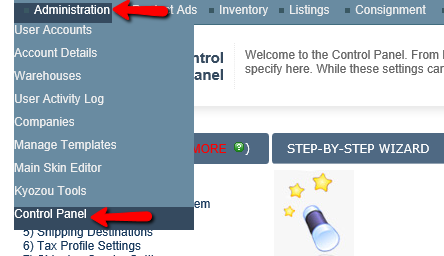
⦁ Go to Administration > Control Panel. (click below for more information)
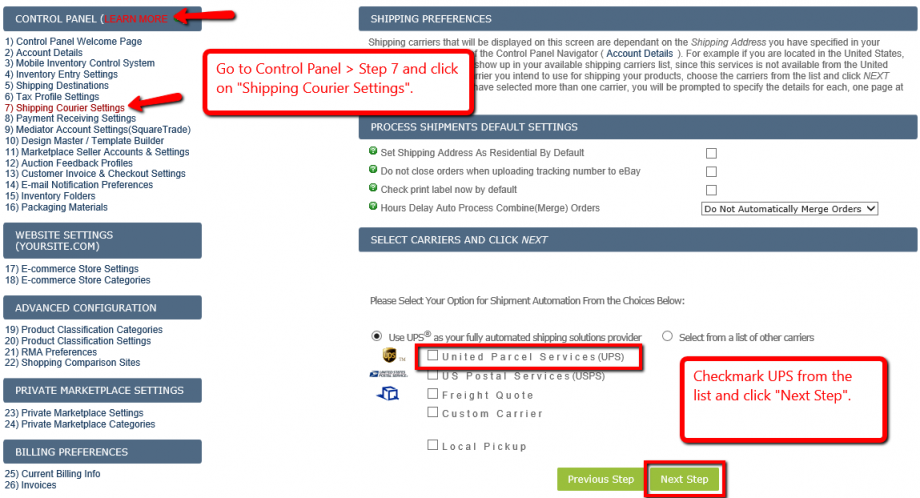
⦁ Go to Step 7 and click on “Shipping Courier Settings”. Under the section “Select carriers and click NEXT “, find the option “UPS”. Checkmark the box and click “Next Step” (click below for more information).
⦁ Starting with the main settings, fill out the Account Number, Username and Password (click below for more information).
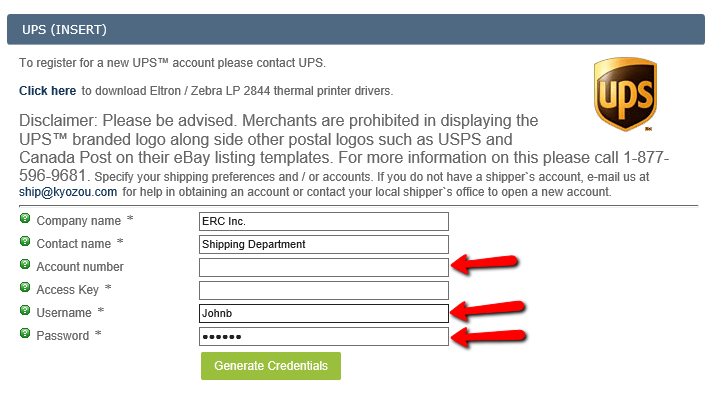
⦁ You will need an “Access Key” to show discounted rates in Kyozou. You can find this by logging into your online account. We also have a step by step guide on how to do this.
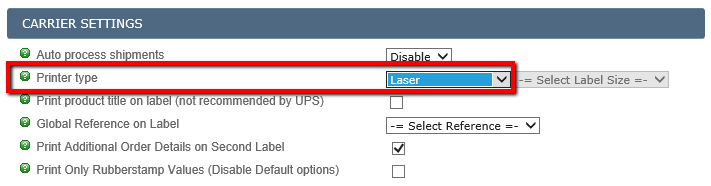
⦁ Under the section “Carrier Settings”, you MUST select a Printer Type (the type does not matter) to be able to save the settings. You can always use help bubbles to get more information about the other fields (click below for more information).
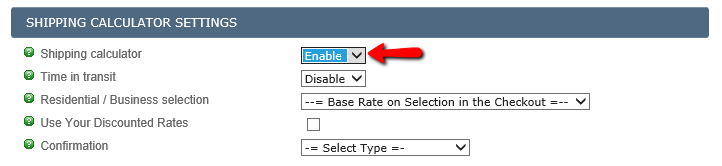
⦁ We recommend you to ENABLE Shipping Calculator under the section “Shipping Calculator Settings” (if you want to see rates for FedEx when shipping via Kyozou) (click below for more information).
⦁ Make sure to click “Save Current Profile” button (at the bottom) before leaving the page to save the changes (click below for more information).

How to modify UPS service levels:
⦁ You can choose which UPS shipping services you want to use in Kyozou by using the ‘Modify Selected Service Levels’ button at bottom of screen. These selected services will be available for both fixed shipping and on process shipments page for calculated shipping. Make sure to click “Update” before leaving the page (click below for more information).

Leave A Comment?
You must be logged in to post a comment.