Summary
This article will explain how to create and manage E-commerce store categories in Kyozou. These categories will display in the navigation menu the same way you set them on this page.
Task Requirements:
- Go to Administration>Control Panel>Step 18 and click on “E-commerce Store Categories”. You will be redirected to the E-commerce Categories Manager page where you can see/update the existing store categories and create new categories/sub-categories (click the image below).
How to create/update a MAIN category?
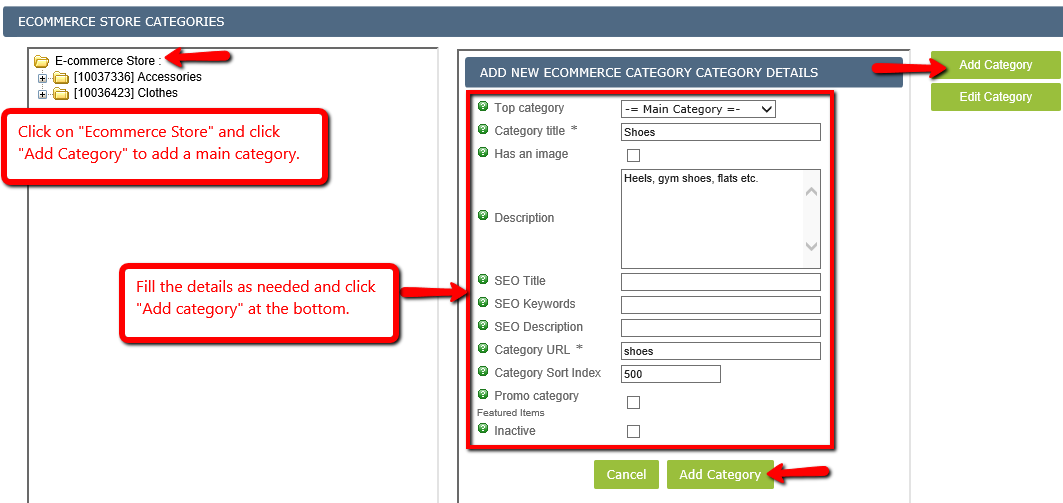
- To add a new category, click “Add Category” button on the right side. In the details section, choose Top category as “Main category” to add a PARENT category. Enter the other details such as category URL, title etc. You can use help bubbles for more information on other fields (click the image below).
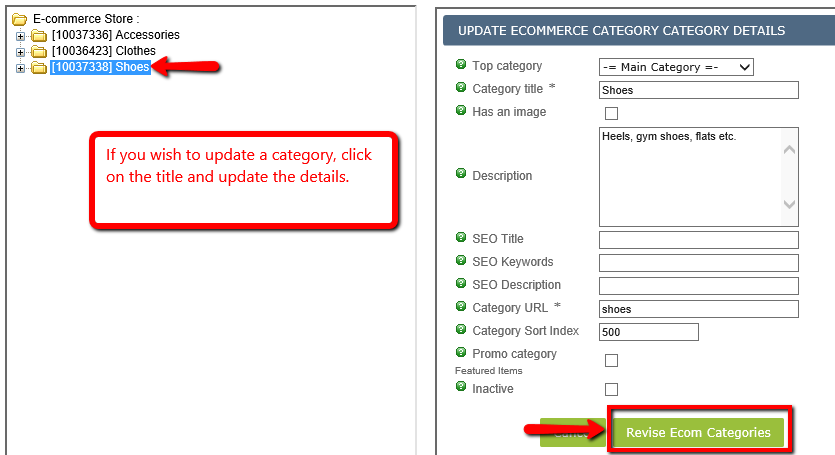
- Once you click “Add category” at the bottom of the details section, the category will be automatically added to the list. If you wish to update any category, click on the category title and edit the details as needed. The update will display on the store within 15 minutes (click the image below).
How to create/update a SUB-CATEGORY?
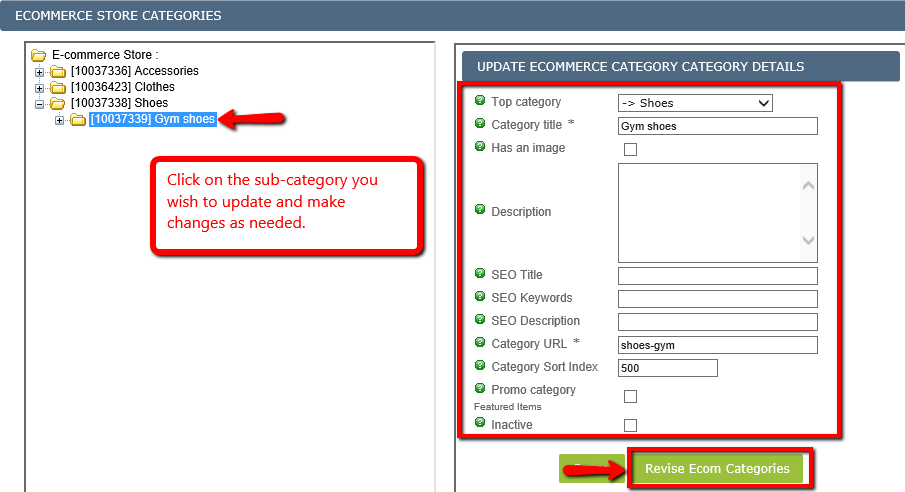
- Click on the main category where you wish to add a sub-category. In the details section, give a title to the sub-category and fill the other fields as needed (click the image below).
- Once you click “Add category” at the bottom of the details section, the sub-category will be automatically added to the list. If you wish to update any sub-category, click on the sub-category title and edit the details as needed. The update will display on the store within 15 minutes (click the image below).
How to DELETE a category?
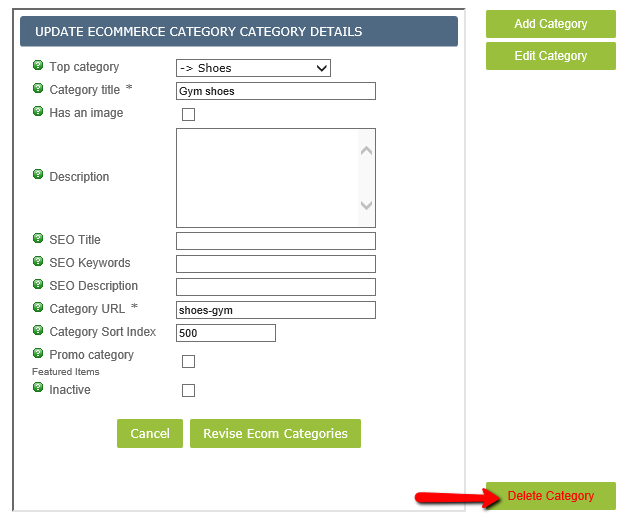
- Click on the category/sub-category you wish to delete. Find the button “Delete category” at the bottom of the category details and once you click on it, the category will be deleted (click the image below).


Leave A Comment?
You must be logged in to post a comment.