
Summary
This article will teach you how to make custom CSS changes in your website by adding the code or filename in Kyozou. This is useful when you want to make a few design changes like font size, colors, background images etc. OR you can prepare a separate CSS file for significant design changes and add the filename in Kyozou.
Task Requirements:
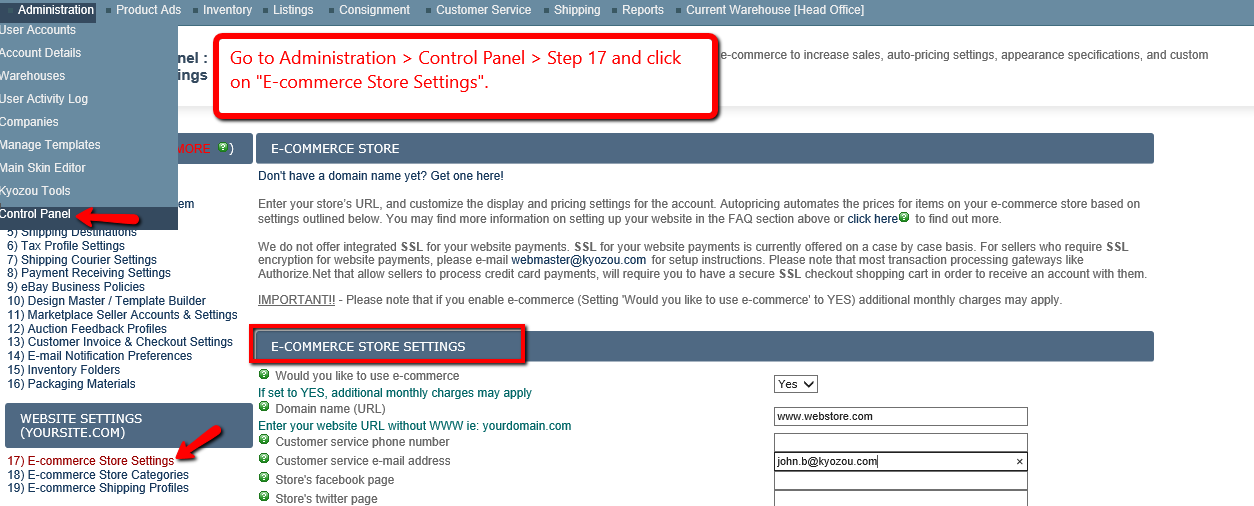
- Go to Administration > Control Panel > Step 17 and click on “E-commerce Store Settings” (Click the image below).
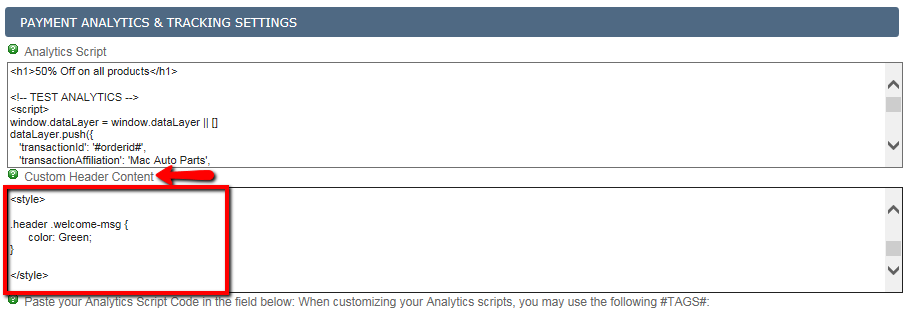
- In the settings, find the section “Custom Header Content”. Enter the design changes, i.e. CSS code in the field provided. When overriding only a few elements, you want to input a few lines of CSS as shown (Click the image below), for ex: <style> .header .welcome-msg {color: green;}</style>. Please note that you have to use “Style” tag while inputting CSS lines.
- If you are creating a separate CSS file, click on this link to find out how to prepare the file. Once this file is ready, it should be hosted online somewhere. For example, if you have created a Store-Styles CSS file and hosted it in hosting.kyozou.com/MyFolder/ , you will be provided a URL, such as
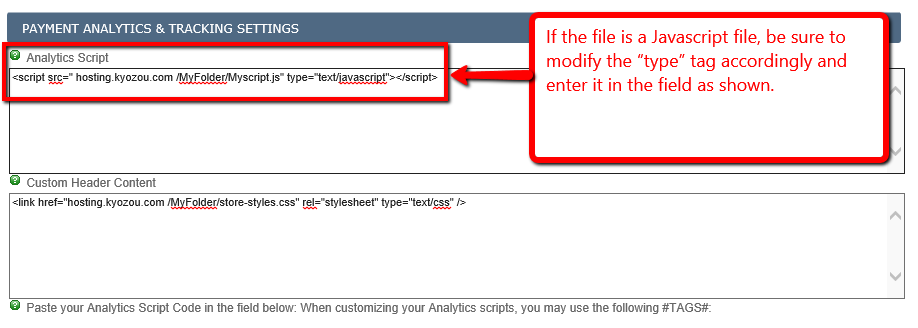
<link href=”hosting.kyozou.com /MyFolder/store-styles.css” rel=”stylesheet” type=”text/css” />. - The URL for this hosted file can then be added to the text box in the field provided (Click the image below).

- If the file is a Javascript file, be sure to modify the “type” tag accordingly, for ex:
<script src=” hosting.kyozou.com /MyFolder/Myscript.js” type=”text/javascript”></script> (Click the image below)
- Once the code/file URL has been added, click “Save and Continue” before leaving the page. Clear cache on your website to see the updated changes.
How to check the output on website?
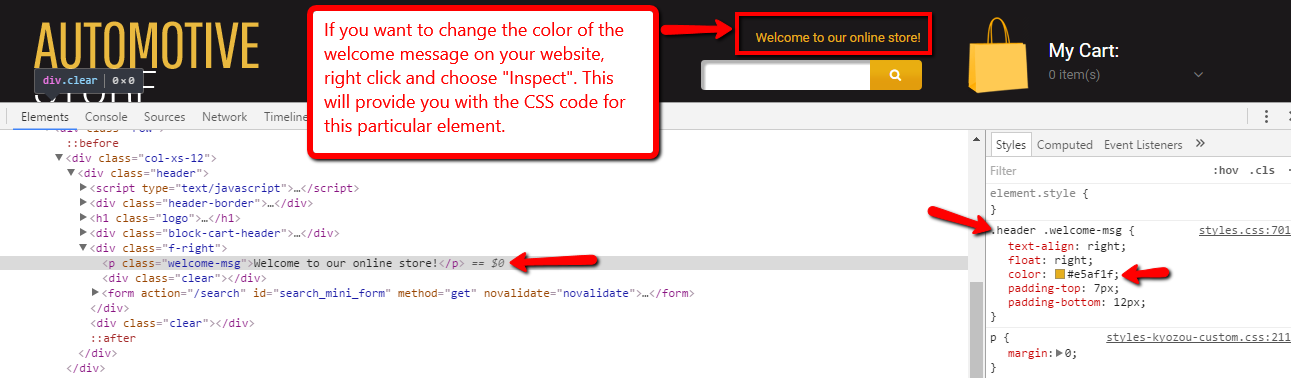
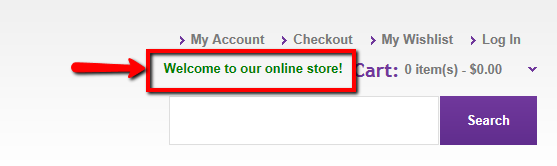
Lets suppose you want to change the text color of the welcome message on your website.
- As seen in the picture, the message is in “Red” color (click the image below). You can right click on the welcome message and click “Inspect” to get the CSS code: header .welcome-msg {color: #e5af1f;}
- So, if you want to change this color to “Green” through CSS: <style>.header .welcome-msg {color:Green;}</style>
- Enter this modified code in the “Custom Header Content” as shown above and save the changes.
- Clear cache on your website to confirm that the color of welcome message has been updated to “Green” (click the image below).
Leave A Comment?
You must be logged in to post a comment.