
How To Create a Parent/Child Variation Listing – Step by Step User Guide
- Hover over ‘Inventory’ on the top header bar and click ‘Add Inventory Item’.
- You can either search the catalog or enter a title and click Simple Ad to go into the product page as usual.
- Fill in the data as usual in the Product Details page, you will be creating a Parent item first.
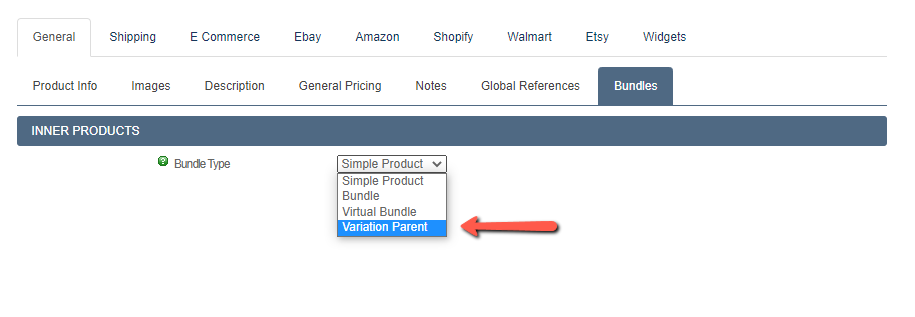
- In order to set the product to variation parent type, scroll down to “Inner Products” and change the ‘Bundle Type’ to ‘Variation Parent’ in the drop down as shown in the screenshot below:
- After adding images, description and shipping info as usual, make sure to add multilister settings for eBay under ‘MULTI LISTER SETTINGS’. You can add 1 or multiple eBay venues to list to.
- You can also add settings for Amazon and /or Shopify if desired. For Amazon, make sure the ‘Use for Multi-Lister’ checkbox is selected. Also, for Amazon, at this time Variations only work with catalog listings (by ASIN) so make sure to select a Parent ASIN and you will add the Child items after the product is created using the next step in manage/search inventory screen.
- Once finished with updating the product page click ‘Add Product’ to create the new Variation parent item.
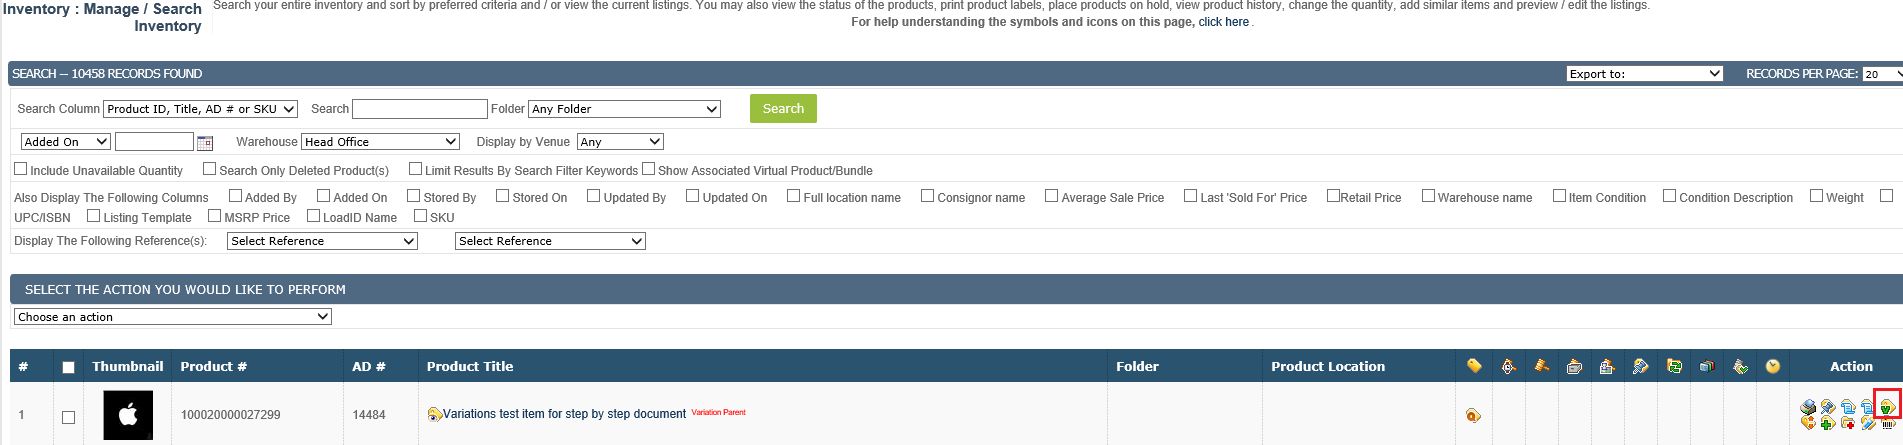
- Next, go to the ‘Inventory: Manage / Search Inventory’ screen and find the product you just created (should be at the top). You’ll notice it will have ‘Variation Parent’ in red text next to the product title.
- On the far-right side under ‘Actions’ please click on the green ‘V’ icon which will bring the ‘Set Variation Properties’ window up where you will create the child items and its settings. See screenshot for the icon:

- At the top of the popup screen, you will see the venues that are enabled and are able to add child items that can be listed to all selected venues.
- The popup screen will look like this before adding any variations to it:
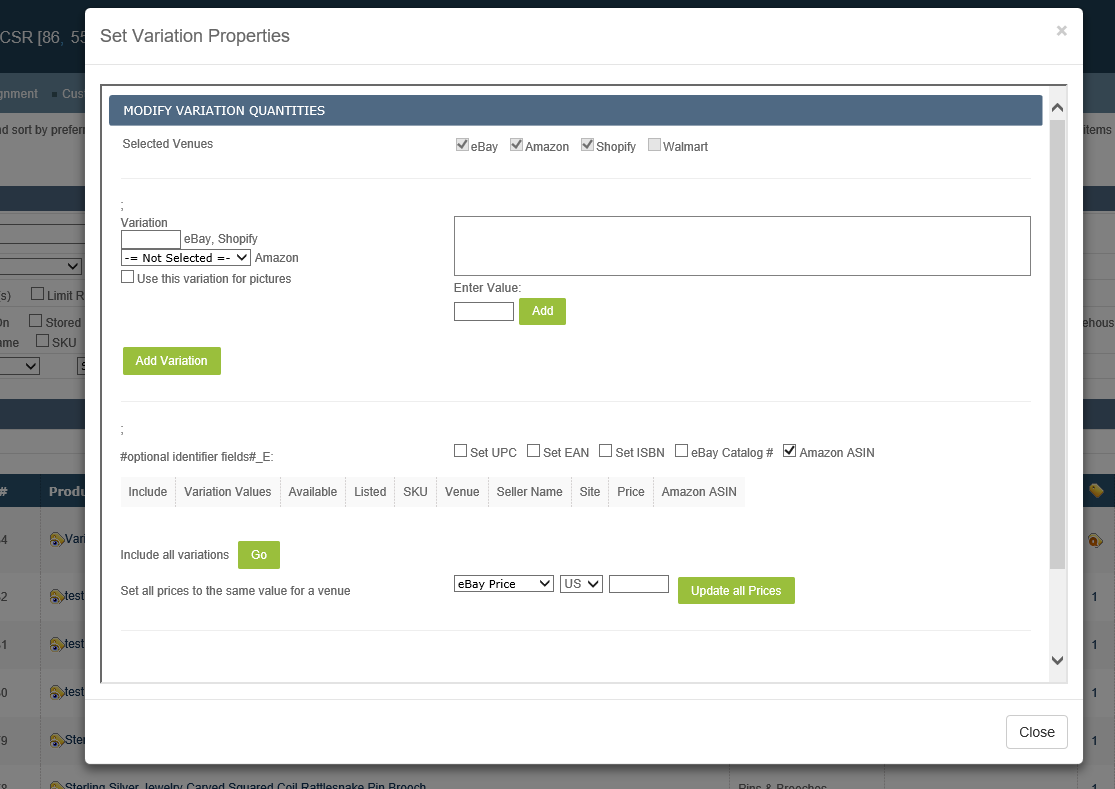
- On the left side under ‘Variation’ add your first variation, for example ‘Size’ (No need to click the ‘Add Variation’ button, that’s for adding a second variation)
- To the right of the Variation, under ‘Enter Value:’ enter the Variation value, for example ‘Small’ and click ‘Add’. This will add your first value, you can repeat the steps to add additional values (Sizes).
- You can add a second Variation by clicking ‘Add Variation’ and naming it for example, ‘Color’ and using the above process to add values to this second variation.
- Note that you can also check the box under one of the Variation names ‘Use this variation for pictures’ which will add an option at the bottom to allow you to upload images for each Variation (for example shirts with different colors).
- Below the Variation data you will see a table that was created with the Variation values and options to set available quantity, SKU’s (Can be left empty for auto population), prices and also finding your Amazon ASIN catalog items which you will need to assign if using Amazon, just click ‘Pick’ and you will get the same catalog search for Amazon that we have in the product page.
- You can also use the option to bulk assign prices to be the same for each venue using the ‘Set all prices to the same value for a venue’ option below the table.
- Once you are done filling out all the information, click ‘Save’ and your data will be updated. (Note that you can also click Validate Data at the bottom which will check your data and confirm if all is good).
- You can close the popup window now.
- In the manage search inventory screen, you can also bring up the window at a glance to see all your variations and their quantities status, to the right of the product title under the ‘Available’ icon you will see the only icon that will bring up that window, see screenshot:
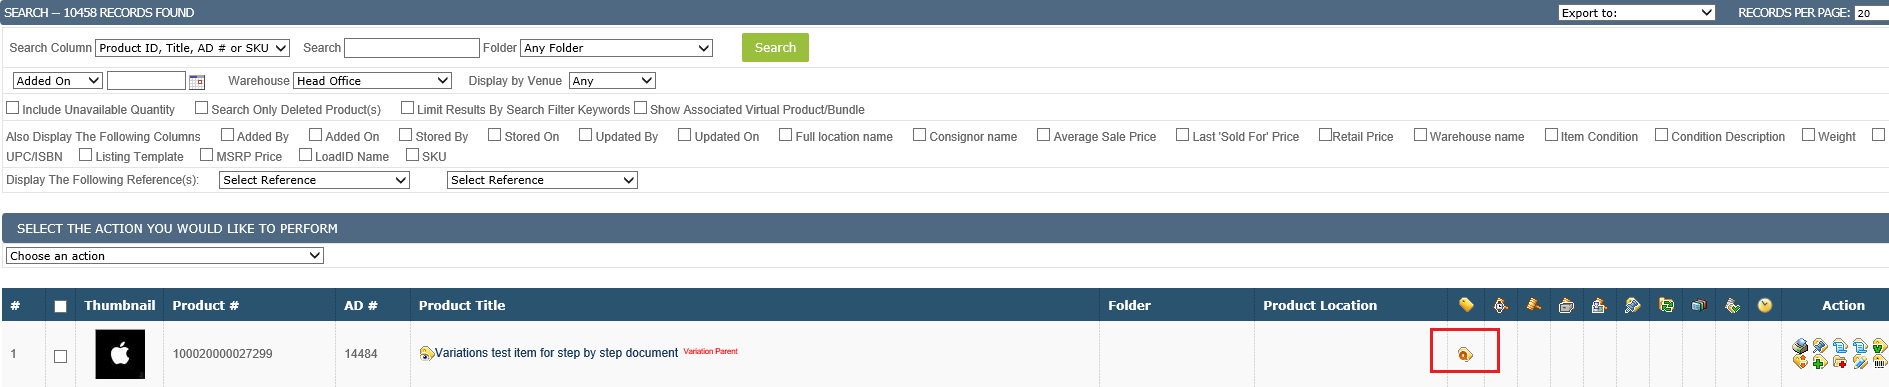
- Note that there are no other values under the different icons on the right, this is due to the fact that it’s a Variation type product.
- Next, we are ready to list the product online.
- Go to Launch new listings for multilister which is ‘Multi-Lister: Ready To List’ screen, from there find your parent item and click ‘list to multilister’ button to the right of it.
- On the final screen, we have the typical settings for listing date and time, you can leave that as is. You will need to click on the ‘Modify Variation Qty’ button to the right of the product info, in the popup that will open simply select the Qty you would like to list online for each Variation value and click ‘Save Quantity Values’.
- Finally click ‘List To Multilister’ button at the bottom left of the screen and your item will be scheduled to be listed to the selected venues.
- Confirm that your listing is active from Multilister, current listings screen. You will see the separate active listings on their respective venues under the AD number + sign
Some notes and limitations:
- Currently the only supported venues are eBay, Amazon and Shopify.
- For Amazon, there is no support for creating new listings, at this point we only support catalog (ASIN) listings.
- We have a basic import via excel support for creating parent / child items for clients that would like to use that option. See WEB-1231 for more information.
- At this point we don’t have the ability to delete variation values once they are created, we are however able to add additional variation names and / or values to a product and also have it reflect on an active listing once the update is done.
Leave A Comment?
You must be logged in to post a comment.