
Cross Browser Changes:
With the new Cross Browser compatibility we have added a new image uploader tool and a new method to printing labels.
New image uploader and editor:
Due to Chrome and Firefox not being compatible with ActiveX or SilverLight we have implemented a new image uploader. If you plan to use either of these browsers with Kyozou you’ll need to do the following.
Enabling the new image uploader:
- Hover over the Administration Tab and Select Control Panel (in main menu)
- Click on step 4 ‘Inventory Entry Settings’
- You will see a new option called “Image Upload Tool”, Select HTML 5 from the list.

- Scroll to the bottom and click Save and Continue.
Using the new image uploader and editor:
- In the product details page click the “Click Here to Add New Image” or “Click Here to Add Multiple Images”
- You will get a popup to select your images. (The tool will sort images alphabetically)
- Once the images are uploaded you can click on the “Edit” button to bring up the new Image Editor.
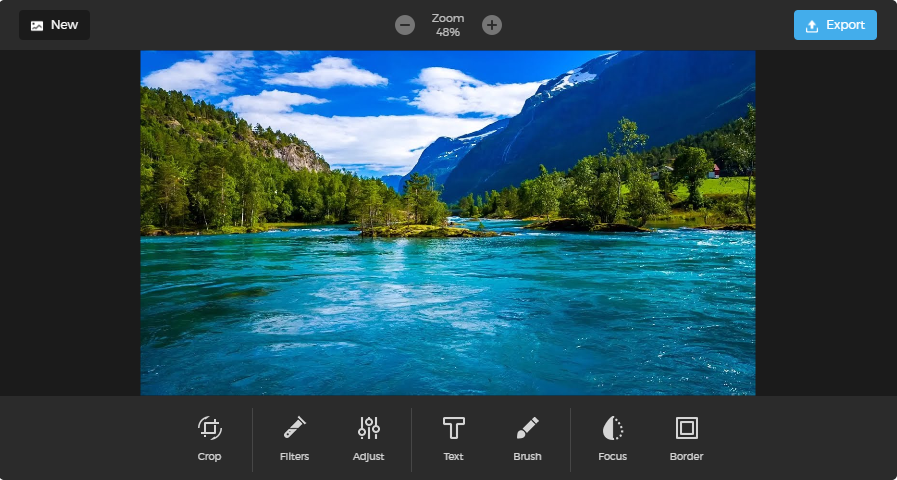
- You will see new editing options with this picture editor.
Installing and Using the Kyozou Printer Client:
- Hover over the Administration Tab and Select Control Panel (in the main menu)
- Click on step 2 ‘Mobile Inventory Control System’
- You will see a new option called “Chose control, compatible with your browser, to print labels” and select “WinFormsApp”
- Click on the link that says “client app” to download the Printer Client

- Scroll to the bottom of the page and click “Save and Continue”
- Now, run the file you just downloaded.
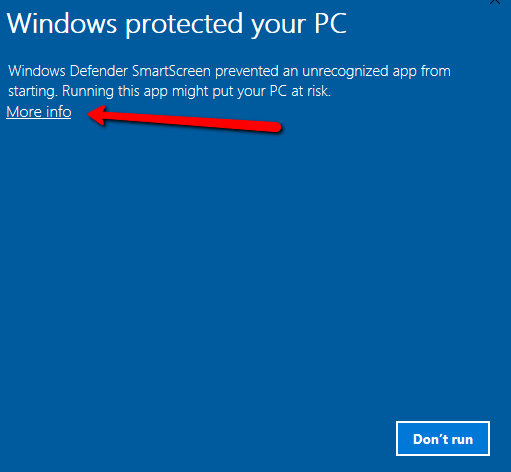
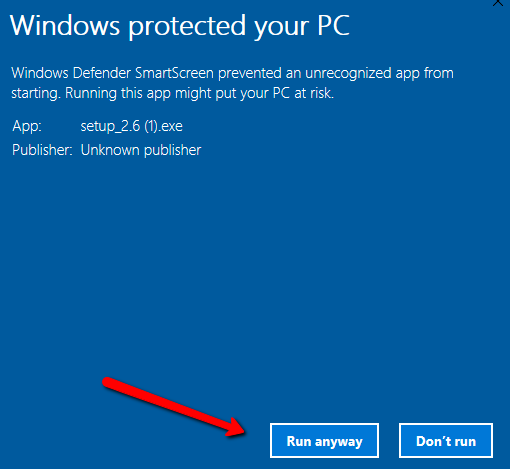
- If you’re using Windows 10 you’ll be greeted with a Windows Defender SmartScreen popup. Click on “More Info” and hit the “Run anyway” button.
- The installer will load and you’ll see a button to go “Next >”, click on it.
- Click on “Install”
- Allow any permissions if prompted. Click Finish on the last screen.
Using the new Printer Client:
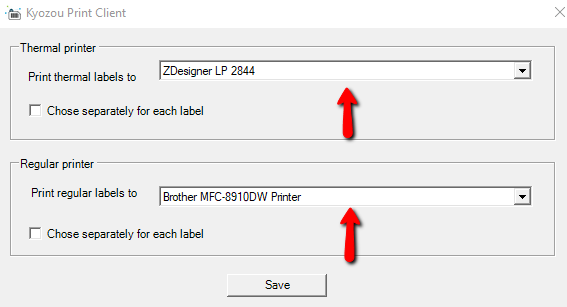
Defining the default printer is done the same way as before. Click on the Thermal Printer Icon at the top right of the page in Manage/Search Inventory.

You’ll see a popup where you can define the default thermal printer and default laser printer. Select the printers you’d like to set as the default and click “Save” (Selecting the “Choose separately for each label” checkbox will require you to select the printer each time you print a label)
Now you can print your labels like before.
Leave A Comment?
You must be logged in to post a comment.