
In this article you will learn how to create auto-relister profiles.
The auto-relister profile can work with Auction style listings or GTC style listings (Please note: If you wish to use the Auto-Relister profile with GTC listings, you will need to use them in conjunction with the GTC Auto Ending Profile.
Step 1: Creating an auto-relister profile.
- Navigate to Listings/eBay/Auto-Lister Profiles/Auto-Relisting Profiles
- Click on the “Click here to Create New Relist Profile” link.
- You will be taken to a new page to create the settings for the new Relist Profile.
Profile Name: This Is where you designate a name for your profile.
Profile Description: You may add a brief internal description to describe what this profile does.
Relist Profile is Active: You can turn this profile off or on with this option.
Add New Rule: Clicking this button will bring up a set of options to create your rules.
4. After clicking on “Add New Rule” you will see options for creating your first rule within this profile.
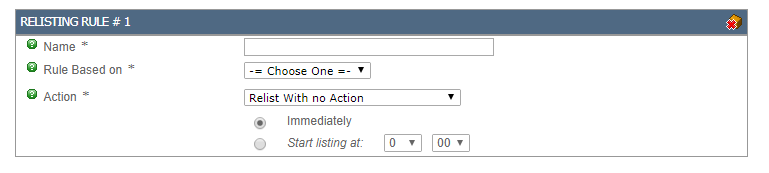
Name: This is where you designate a name for the first rule of this profile.
Rule Based on: This is where you set what event triggers your profile:
- Unsold : The profile will trigger when the item goes to Unsold. (Set the value for “Apply if number of unsuccessful sales less than” to 1 to apply to all unsold listings that have this profile set) You can set up multiple rules which will be explained later in the article.
- Views/Hits: The profile will trigger based on the number of views or hits specified.
- Bids: The profile will trigger based on the number of bids the auction ended with (Only applies to auctions where the reserve price has not been met)
Action: This is where you decide what happens with the product when it goes to Unsold.
- Relist With no Action: The product will be relisted with no modifications.
- Move to Inventory Folder: The Product will not be relisted but moved to the designated folder set within the Rule.
- Change Listing Options: You can modify a few settings in the product such as Listings Type, Duration, Price, or Listing Template.
- Send to QA for Additional Approval: Items will be returned to Inventory and will need to be reviewed before they can be listed again.
Return To Inventory: The item will not be relisted and returned to Inventory.
5. After adding the settings to the first rule you can click on “Save Relist Profile” to create and save the new profile or you can click on “Add New Rule” to add a 2nd rule for a more advanced re-list profile.
For example, you can create a profile with the following rule set:
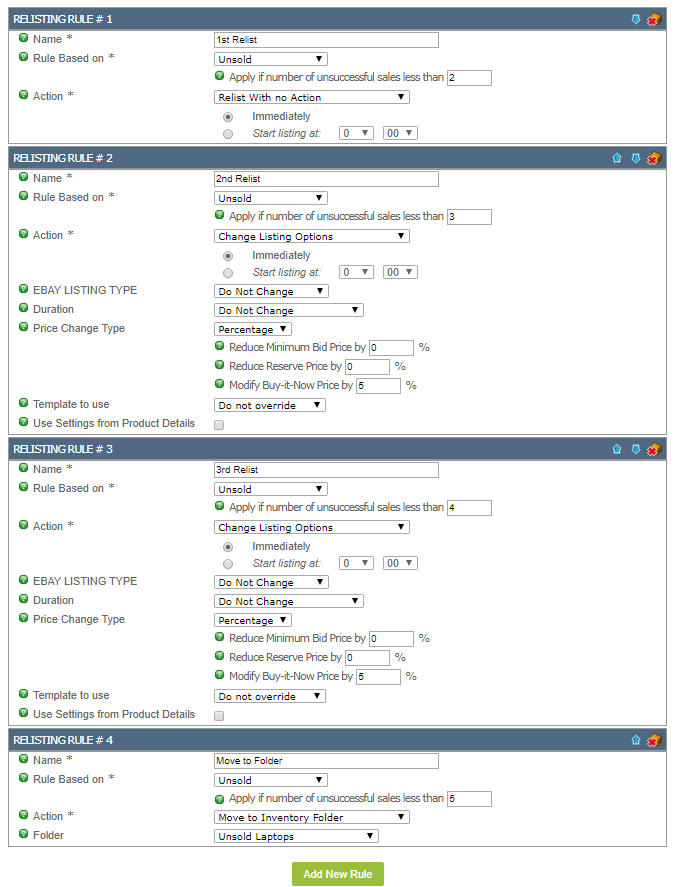
With the following rule set Kyozou will relist the product the first time without any changes. If the product doesn’t sell for a 2n time Kyozou will reduce the price by 5%. If the product goes to Unsold for a 3rd time the price will reduce for an additional 5%. Should the item go to Unsold for a 4th time it will be moved to a non-listable folder called “Unsold Laptops” where the item can be disposed of or bundled with other unsold items.
Step 2: Assigning an auto-relister profile to a product.
When creating or editing an existing product you will see a dropdown option to assign a Relist profile for your product:

You can also assign an auto-relister profile to a product in bulk using an Excel spreadsheet.
Sample Headers:
| ProductID | RelistProfileName |
| 12345 | Enter Profile Name |
Leave A Comment?
You must be logged in to post a comment.