
Summary
The Manage Shipments page is where you can manage your shipments, print shipping labels and search/view shipment details. In addition, you can view historical data of your shipments to see their tracking numbers, dates when they were processed etc.
Before we start…
- Locate Shipping in the navigation menu and choose Manage Shipments. You will be navigated to the Manage Shipments page.
Task Requirements:
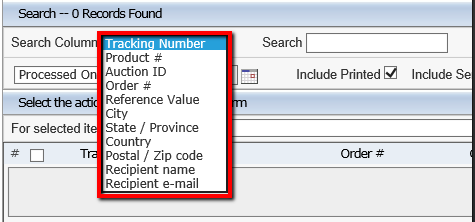
1- Search Section: You can search for shipments in the search field by Tracking Number, Product #, Order # etc. (click the image below).
2- Filters: These filters are provided to help you with the search results (Click the image below).

As seen in the images above:
- Courier & service level: Search by UPS Ground, USPS First etc.
- Processed on: Search by the date the shipments were processed.
- Include archived/voided: Search including voided shipments.
- More filters:
- Include printed: Search by including printed shipments.
- Include sent: Search by including sent shipments.
3- Display and Export options:
As seen in the image above:
- Columns: You can display additional columns in the search results, for ex: Shipment processed by etc.
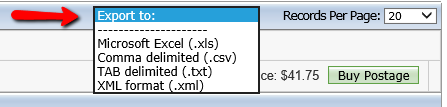
- Export to: You can export the search results in different file formats, for ex: .xls.
- Records per page: You can display the number of records you want to view on this page (defaulted to 20).
4- Additional Options:

- Create new Shipment: Click this link to create a new shipment and you will be taken to the Process Shipments page (click the image below).
5- Shipments Options:
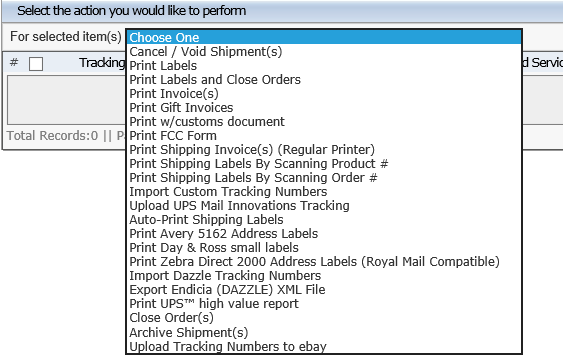
a) Manage shipments and orders:
As seen in the image above:
- Cancel/void shipments: This option can be used to cancel/void the selected shipment(s).
- Print Labels: This option allows the user to print another (exact) copy of the already printed shipping label.
- Labels and close order(s): This option removes the tracking number sent to eBay, as there are other venues. This feature was really used more for auto-processing as the tracking numbers would already be applied and they could select those shipments and print labels/close the orders in one step.
- Print Invoice(s): Print invoices as set up in Control Panel Step 13.
- Print Gift invoices: Print gift Receipt.
- Print Labels /w customs document: This option prints labels with customs documentation.
- Print FCC form: Print FCC form for selected shipments
- Print Shipping invoice(s) (Regular printer): Print shipping invoices for regular printers.
- Print Shipping labels by scanning product #: Print shipping labels by scanning the barcode on the product label.
- Print Shipping labels by scanning order #: Print shipping labels by scanning the barcode on the invoice.
- Import custom tracking numbers: Use this option to import custom tracking numbers.
- Upload UPS Mail innovations tracking: You can upload the tracking numbers via excel file received from the UPS.
- Auto-print shipping labels: Choose this option to auto-print the shipping labels after the shipments are processed.
- Avery 5162 address labels: Print labels for Avery 5162 printer.
- Zebra Direct 2000 address labels (Royal Mail compatible): Print labels for the Zebra Direct 2000 printer.
- Export Endicia (DAZZLE) XML file: This option will export the XML file to your computer which will prompt the dazzle software to print the shipping labels.
- UPS™ high value report: Print High Value Report for selected shipment(s). Applicable to UPS Shipments with Insured value of $1000 or more!
- Close order(s): Click this to close orders from the shipment(s).
- Archive shipment(s): Use this option to archive the selected shipment(s).
- Upload tracking numbers to eBay: This option is used to upload the tracking numbers
6- Icons:
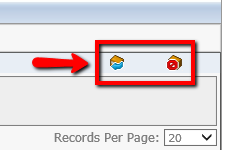
As seen in the image above:
- Shipment sent: This icon means that the shipment is already sent.
- Shipment voided: This icon means that the shipment is canceled/voided.
Leave A Comment?
You must be logged in to post a comment.